If your bicycle has been in storage for a year, it’s important to perform some maintenance tasks to ensure that it’s in good working condition before you start riding it again. Here’s a step-by-step guide to help you repair and prepare your bicycle for riding after a year in storage:
1. Clean the Bike:
Start by giving your bike a thorough cleaning. Use a gentle bike-specific cleaner and a soft brush to remove dirt, dust, and grime that may have accumulated during storage. Clean the frame, wheels, drivetrain, and all components.
2. Check the Tyres:
Inspect the tyres for any cracks, punctures, or signs of damage. Inflate the tires to the recommended pressure (indicated on the sidewall of the tyre) using a bike pump with a pressure gauge. Check for any air leaks and make sure the tyres hold pressure.
3. Inspect the Brakes:
Check the brake pads for wear and replace them if they are significantly worn down. Test the brake levers to ensure they engage smoothly and provide adequate stopping power. If you have rim brakes, check the brake pads for proper alignment with the rims.
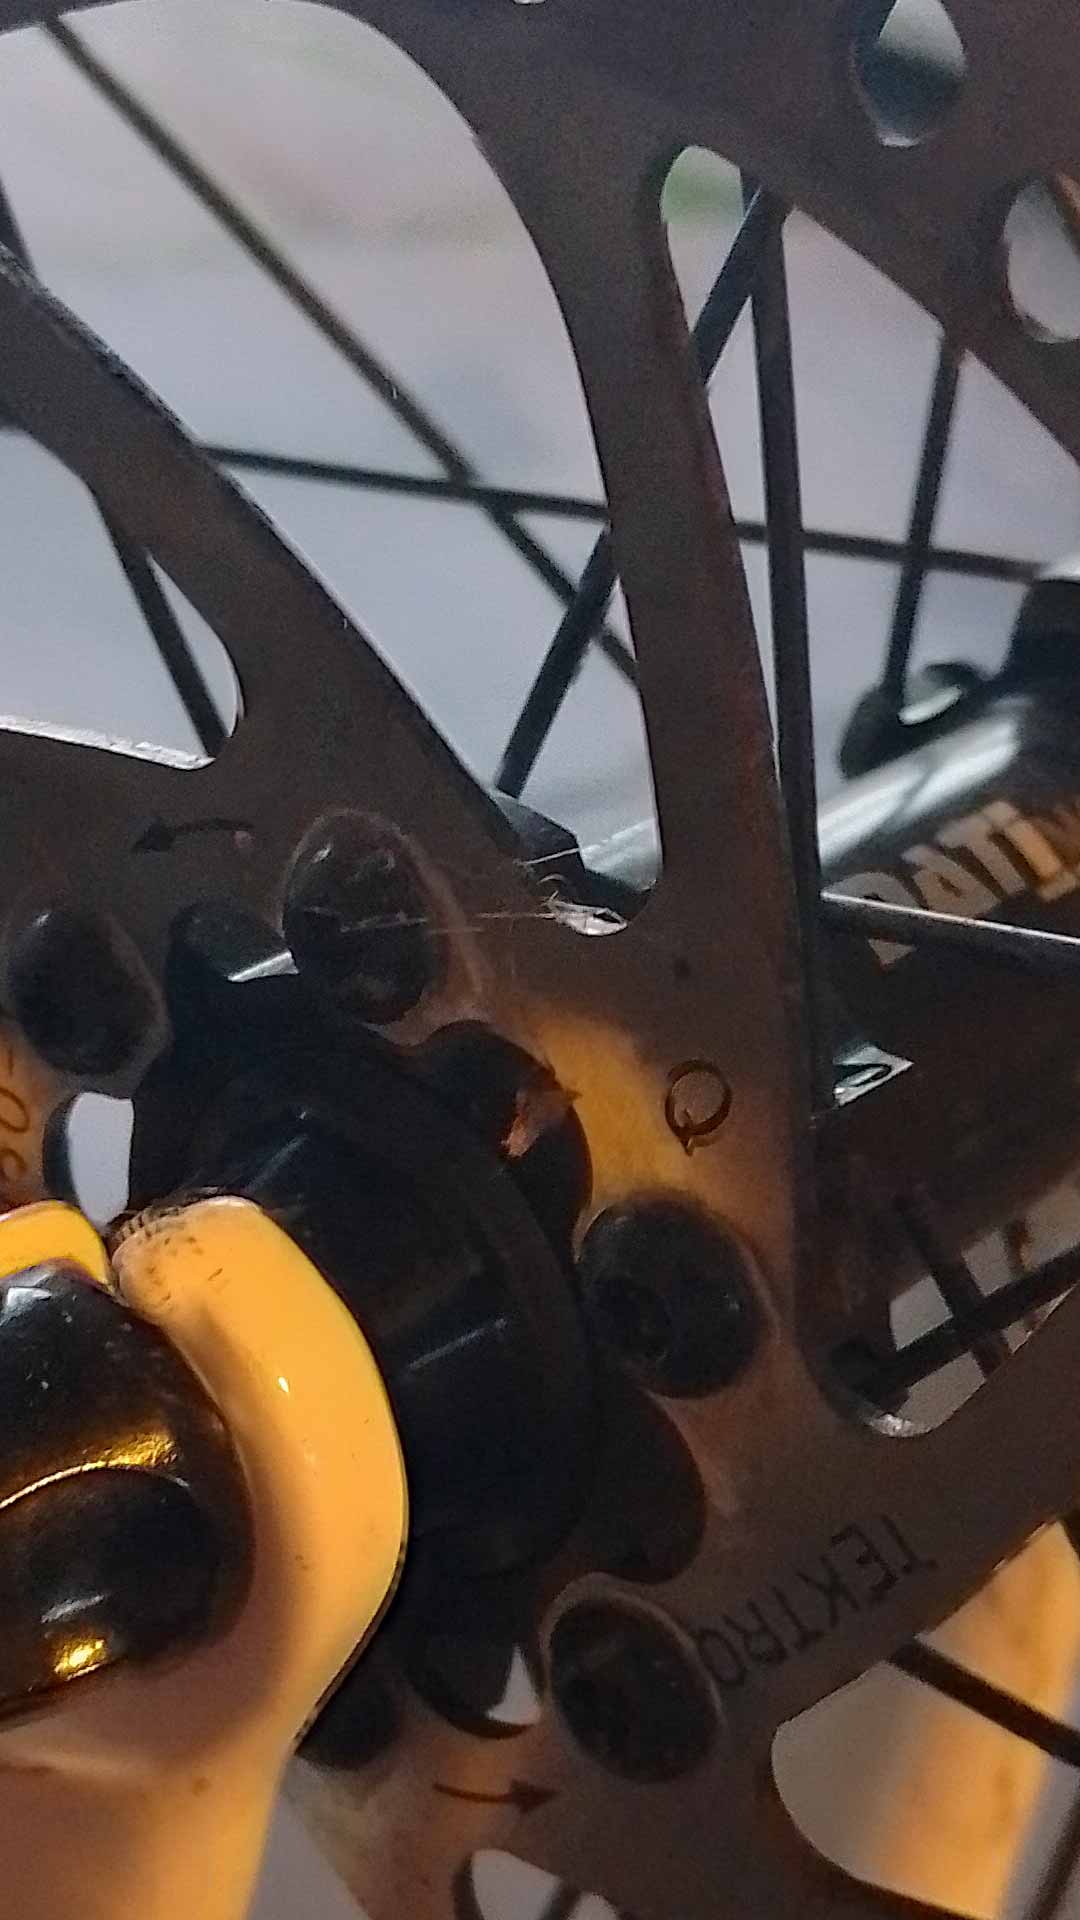
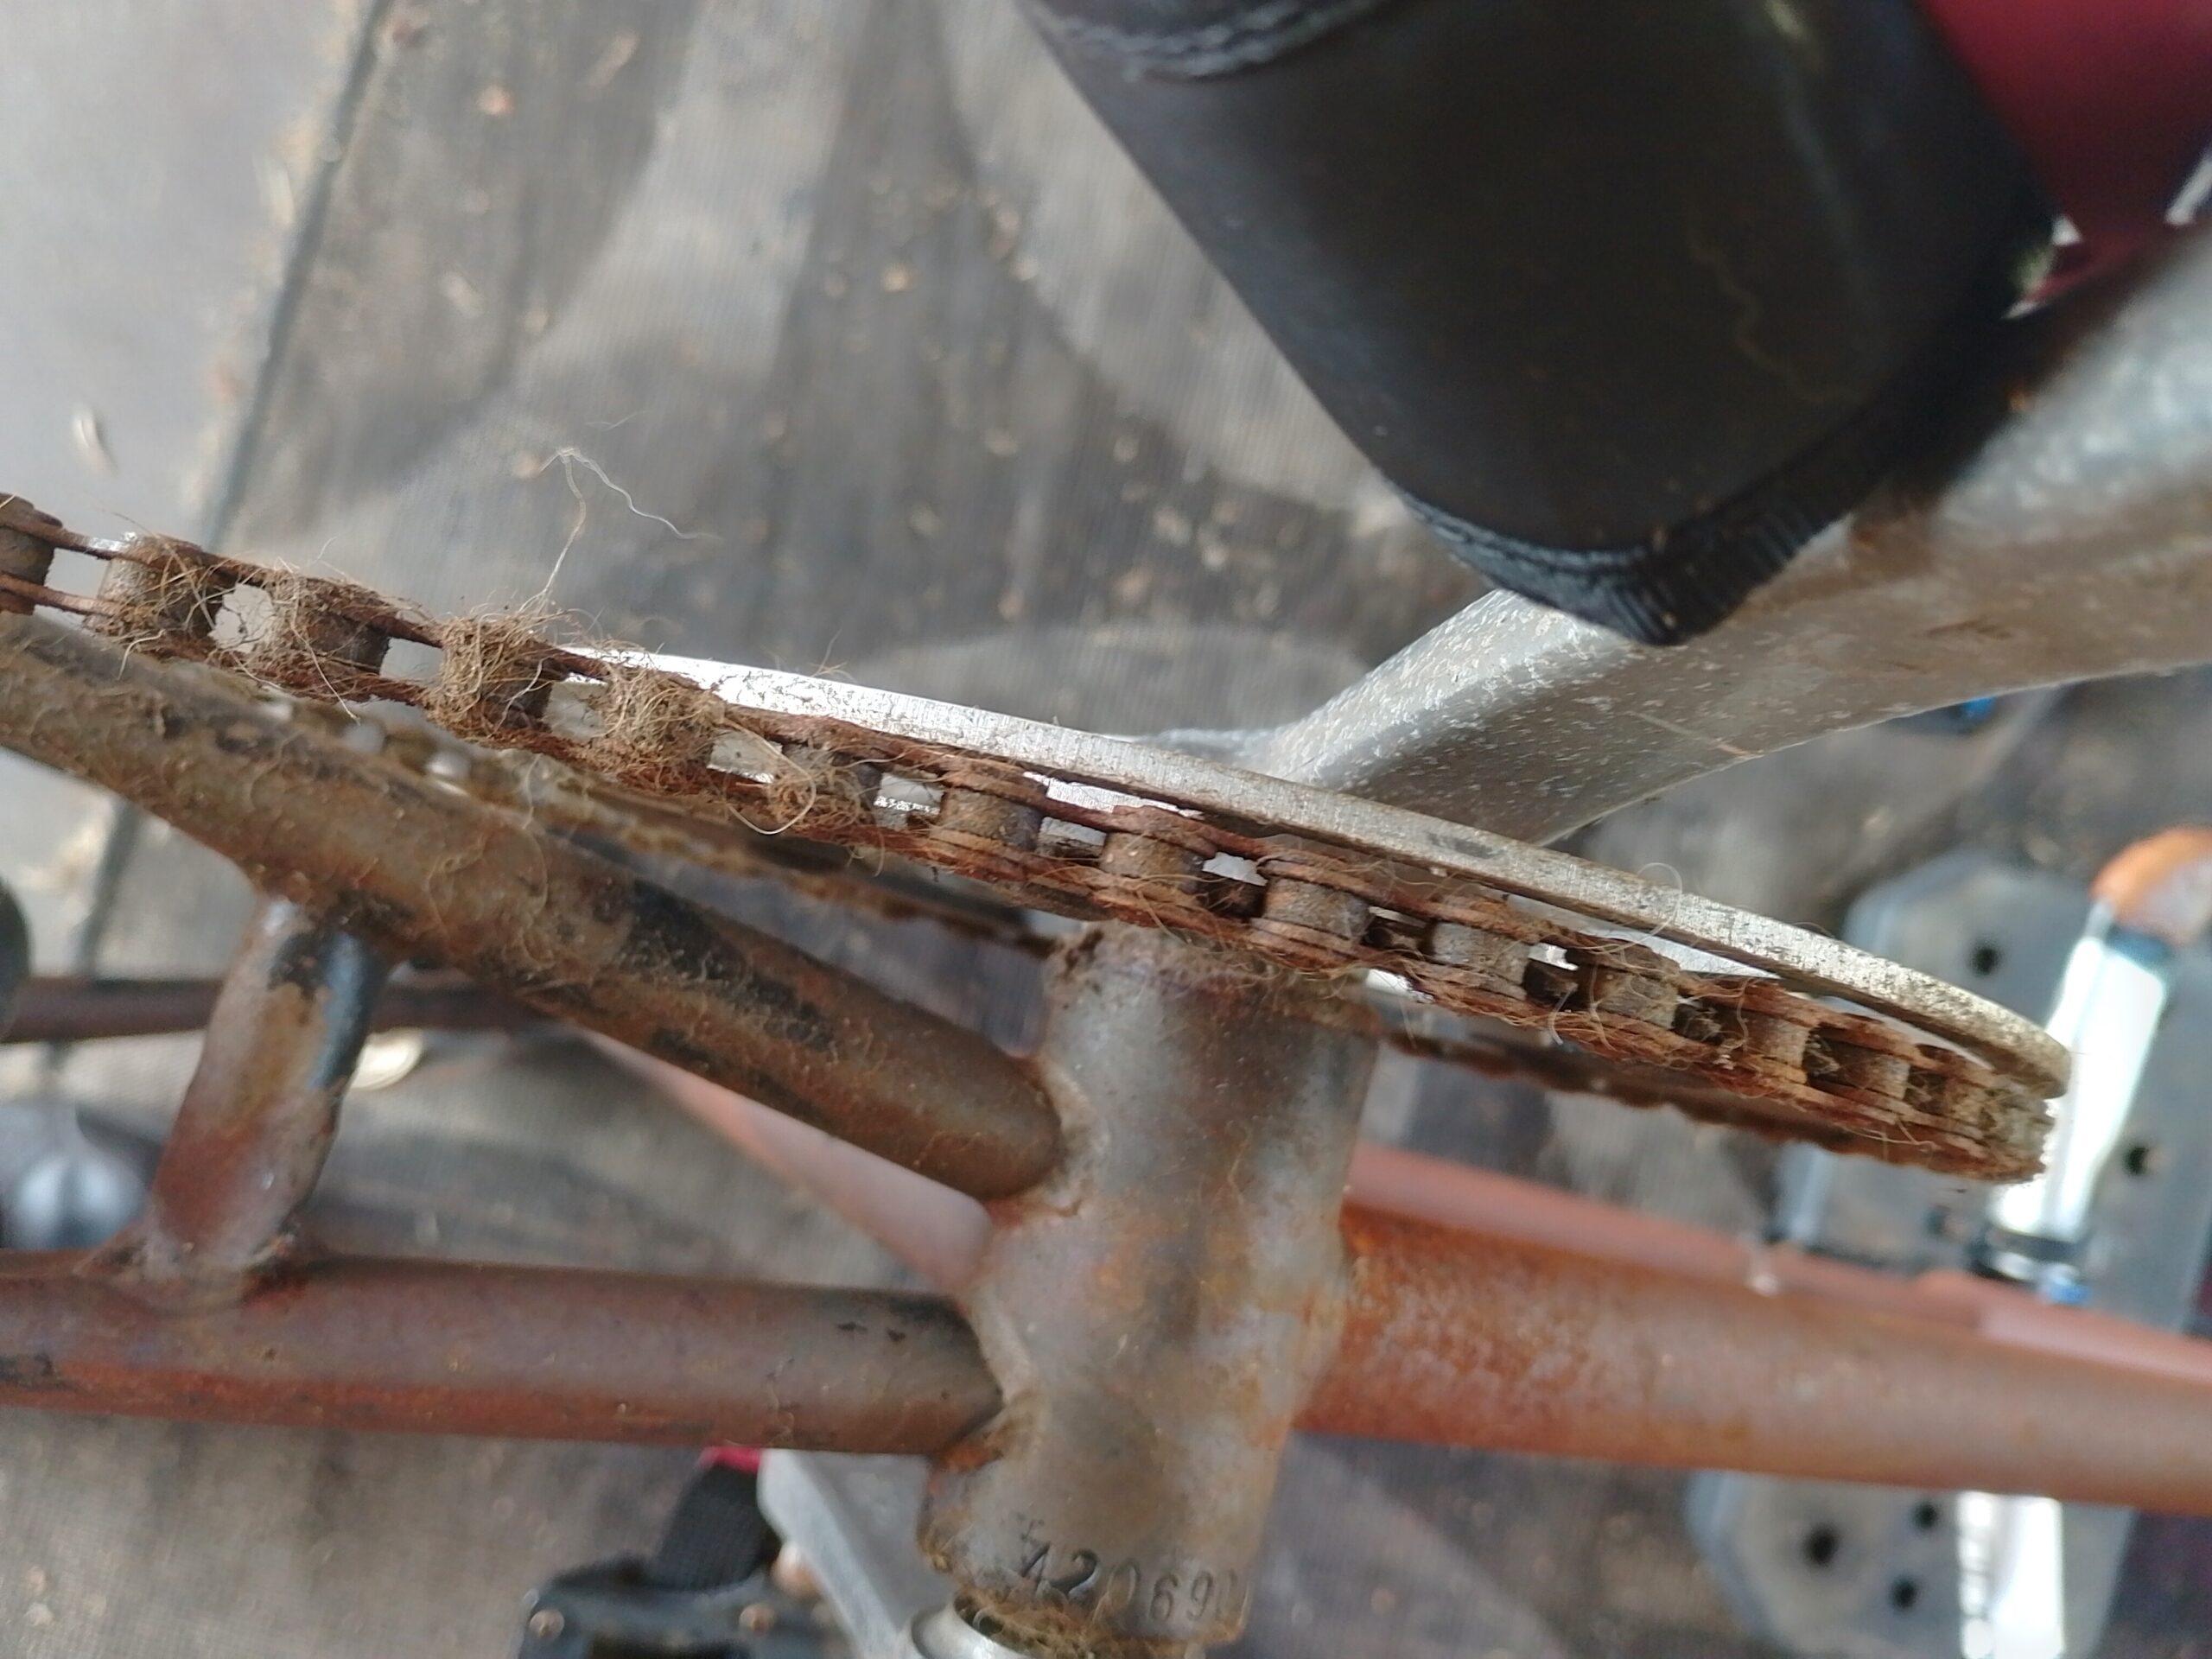
4. Check the Drivetrain:
Inspect the chain for rust, stiffness, or excessive wear. Lubricate the chain with a suitable bike chain lubricant if it appears dry. Shift through all the gears to make sure the derailleurs are working properly. If the shifting is sluggish or inaccurate, you may need to adjust the derailleur cables.
5. Lubricate Moving Parts:
Apply a small amount of bike-specific lubricant to pivot points, moving parts, and cables to ensure smooth operation. Avoid over-lubricating, as excess oil can attract dirt and debris.
6. Check the Cables and Housing:
Inspect brake and derailleur cables and housing for signs of rust, fraying, or damage. Replace any cables or housing that show significant wear or corrosion.
7. Check the Bolts and Fasteners:
Inspect all bolts and fasteners on the bike, including those on the handlebars, stem, seatpost, and wheels. Make sure they are properly tightened to the recommended torque specifications. Use an appropriate torque wrench if available.
8. Check the Suspension (if applicable):
If your bike has front or rear suspension, check the suspension components for proper function and any signs of leaks or damage. Follow the manufacturer’s guidelines for maintenance and adjustments.
9. Inflate the Suspension and Dropper Seatpost (if applicable):
If your bike has suspension forks or a dropper seatpost, make sure they are properly inflated or adjusted according to the manufacturer’s recommendations.
10. Safety Check:
Once you’ve completed all the maintenance tasks, take your bike for a short test ride in a safe area. Pay attention to how it handles, brakes, and shifts gears. Make any necessary adjustments based on your test ride.
If you’re unsure about any of the steps or if you encounter more complex issues, consider taking your bicycle to a professional bike shop for a thorough inspection and tune-up. A professional mechanic can ensure that your bike is safe and fully functional for riding.
Remember that regular maintenance and care will help keep your bicycle in good condition and extend its lifespan, even during periods of storage.